Setting Up My Own Mailserver (Stalwart)
TLDR; Me renting about mail, you can skip to Options, if you don’t wanna read it, because you already know
Mail usually totally sucks, you register somewhere for free, like gmail or whatever, and need to provide tons of personal data + have them scan your mails (not sure if they openly admit it tbh, but I believe they do even if claimed otherwise…). Mails are horrible for privacy … They are often unencrypted (except if you set up PGP and your communication partner also uses it, but almost no one except in the privacy corner does so …). There are some providers who don’t ask you for as much, like Proton. Still it sucks, you can’t easily move provider etc. Lets say they decide to charge everyone one day … Or change their privacy policy, or make some controversal tweets … and you want to distance yourself from them.
Also free plans are kinda limited, only one mail address … no aliasing etc. Also the usual mail addresses are trash, like
So whats the solution? Host your own mail server
#Options
Popular onces are:
- Mailcow
- Mail in a Box
- Docker Mail Server
- Stalwart
and some more, I picked Stalwart, as it’s written in Rust, meaning its fast and memory safe, so one whole class of exploits (everything that has to do with memory (which is easily half) doesn’t exist), and its fast & stable.
#Setup
#Presetup
Make sure you have in your domain dns set:
... (nameserver record, soa record)

@	IN	A	<server_ip>
mail	IN	A	<server_ip>
(@ and mail pointing at your servers ip)
#Installing Stalwart
It’s was pretty easy in the beginning, until SSL didn’t work for some reason, tbh I find the documentation kinda lacking … So first of, you can just follow the installation guide from stalwart, still I write the steps here down, so that you can easier follow me along (also ommited the more edge case stuff, most linux distros use systemd nowadays etc. its the default basic setup) …
- Get the install script & launch it (btw, the docs suck here kinda, as the copy button copies the $ along …)
curl --proto '=https' --tlsv1.2 -sSf https://get.stalw.art/install.sh -o install.sh && sudo sh install.sh- Get the temporary credentials from the logs
sudo journalctl -u stalwart -n 200 | grep -A8 'bootstrap mode' | head -n 5
- WebUI Setup
Go to http://<server_ip>:8080/ to see the installation wizzard
For the hostname, they want basically your domain with .mail in front of it
Like lets say you want to later send / receive mails with hello@example.de, you set the hostname to mail.example.de. The domain thingy is the ending you want to use, so only example.de.
Leave the automatic tls and sininging keys on, tls won’t work still (at least not for me).
Now you can basically just click through every setup page without changing anything, the defaults are okay and don’t need to be modified. Only the last step (DNS sth.) might be worth changing, you can add your providers api key here if you want. It will do the stuff automatically then. But I didn’t …
After finishing go your terminal again and run:
systemctl restart stalwartThen you’re supposed to be able to login on https://yourdomain/, but although I could enter it (after a certificate warning), when entering my login, it just failed …

so I just went back to http://yourdomain:8080/ and logged in there again.
#SSL Configuration
Well the installation didn’t get any SSL Certs by itself for some reason (even after reinstalling etc.). So what you should do is:
Go in the dashboard on the right to Domains > Domains, click on your domain, scroll down to the TLS Section, and add here as additional hostnames your domain and mail.domain …
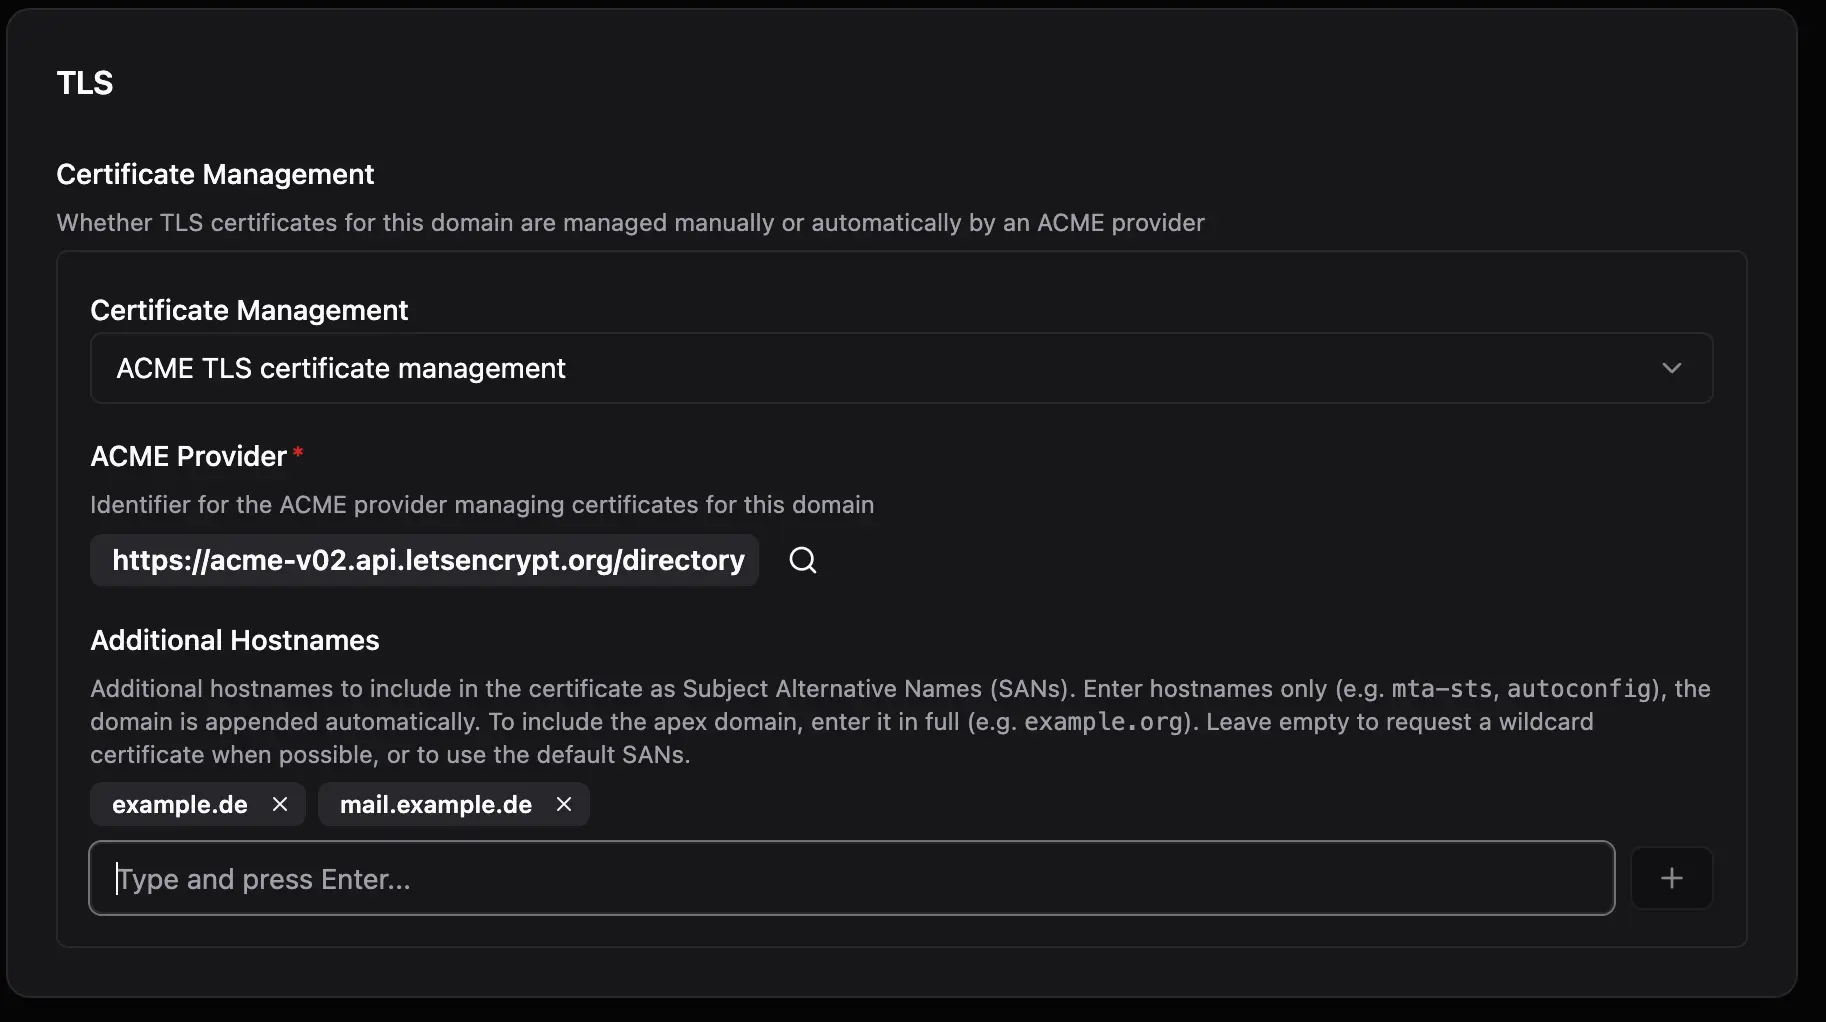
now you might need to wait a while, but it should be able to get now finally some certs. (Like you can wait 15min or so if you want, or check in the Logs Section in the side panel (Observability > Logs) for when it will run and then just come back when it changed to sth in the distant future (~3months ig))
now the certs are there, still login to the portal via https stills fails after the login, although now without cert issue
#DNS Settings
Go to Domains > Domains and select the 3 dots on the right of your domain entry:
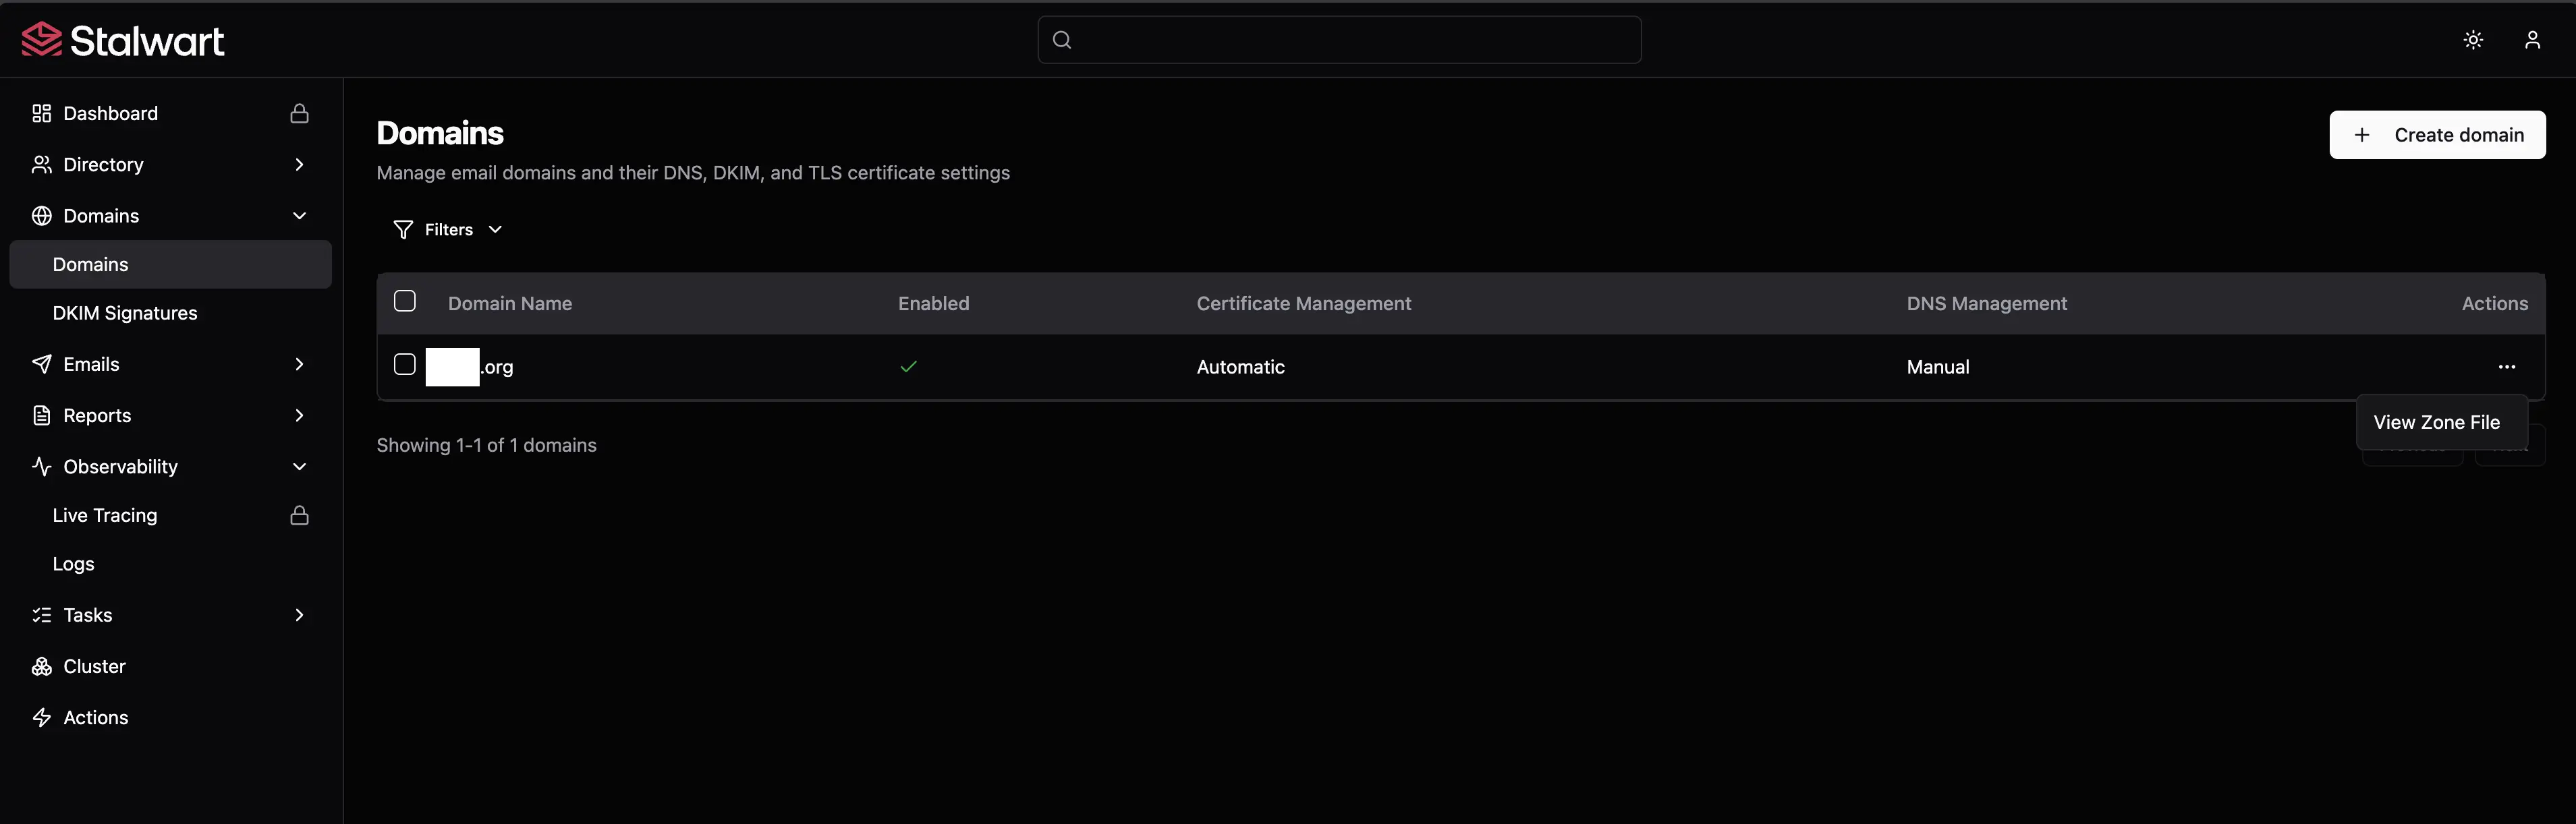
Now view zone file, copy all the content and head to your dns provider (in my case Hetzer), there you need to paste this in your zone file:
In the case of Hetzner, inside your “project”, head to dns (on the left), click on your domain, then click the “Actions” Button (right top), go to edit zone file and paste everything at the bottom & save.
Now that this is done your mail server is ready.
#Reverse DNS
You probably also want to setup reverse DNS, since many mail providers (you might want to communicate with) check if your ip also resolves to your domain. For this go to your server settings and set the reverse entry to sth like mail.example.org.
You can verify this setting via: dig -x <ip> +short. Note: It usually takes quite a while to update (at least for me it took)
❯ dig -x 1.1.1.1 +short
one.one.one.one.
means the reverse Entry of 1.1.1.1 point to one.one.one.one, which is usually a good sign, you want sth similiar, pointing to your mail server hostname.
#Testing
You can now head to your mail client (e.g. Thunderbird) and add your account with your domain and admin password, all settings can be figured out automatically.
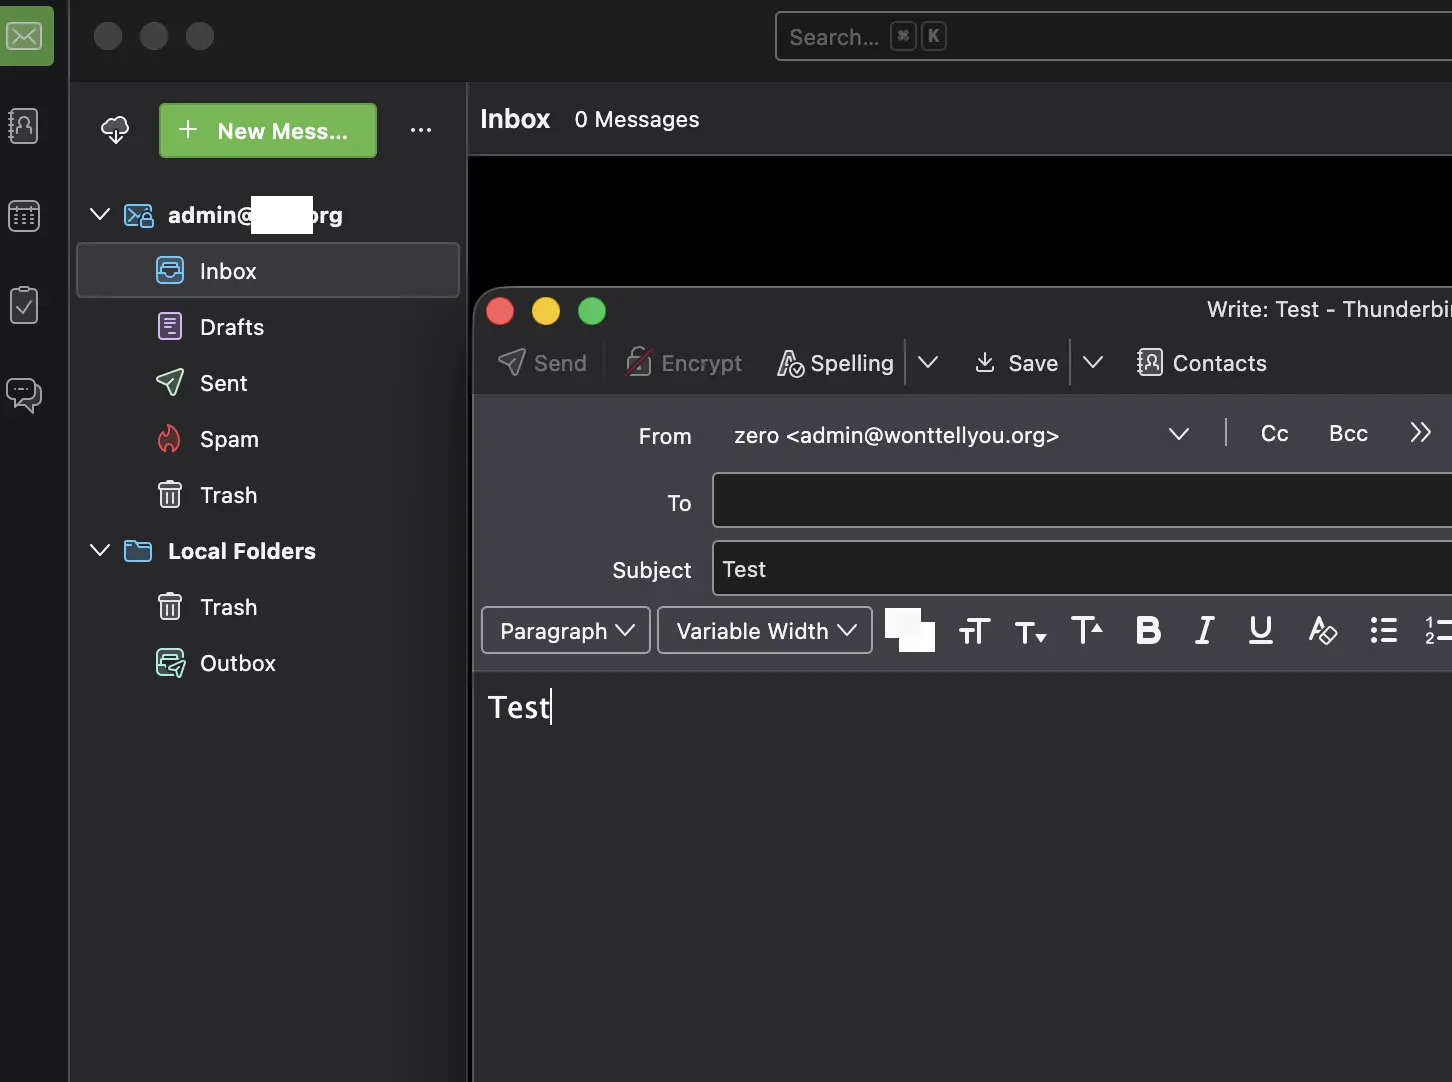
Now you can go to the web portal again and create a new custom mail box like hello@domain etc. and add them to your mail clients.
Note: I’m gonna soon write a follow up article talking about how I set up mail aliasing on my own server via a script, so that one can just run genalias <keyword> to get a new mail alias (
mail linux privacy server digital-independence stalwart self-hosting
1054 Words
2026-07-02 13:19 (Last updated: 2026-10-18 16:37)
ba4175d @ 2026-10-18